I recently had someone call me up right before going on air to do a radio interview who wanted to know if I could record the interview. After confirming the radio station had an Internet stream, I figured my best bet was to use VLC to record the stream, and that ended up working perfectly.
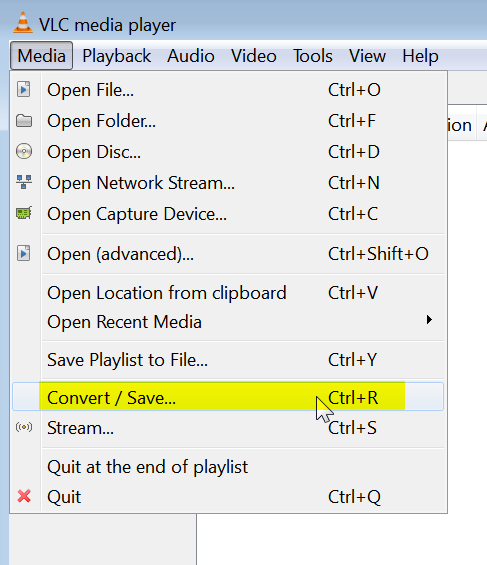
To capture audio streams with VLC, you want to go the Media menu and click on the Convert/Save option near the bottom of the menu.
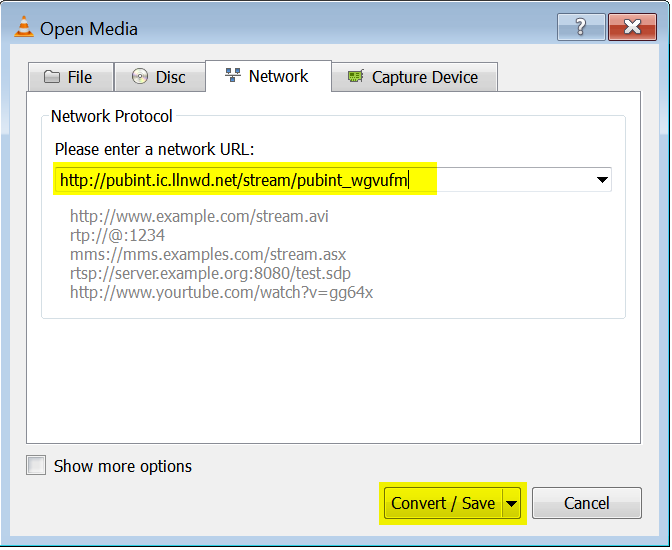
This will bring up the “Open Media” dialog box. You want to select “Network,” as I’ve done below. Past the URL to the stream into the “Please enter a network URL:” field, and click on the “Convert/Save” button in the lower right-hand corner of the dialog box.
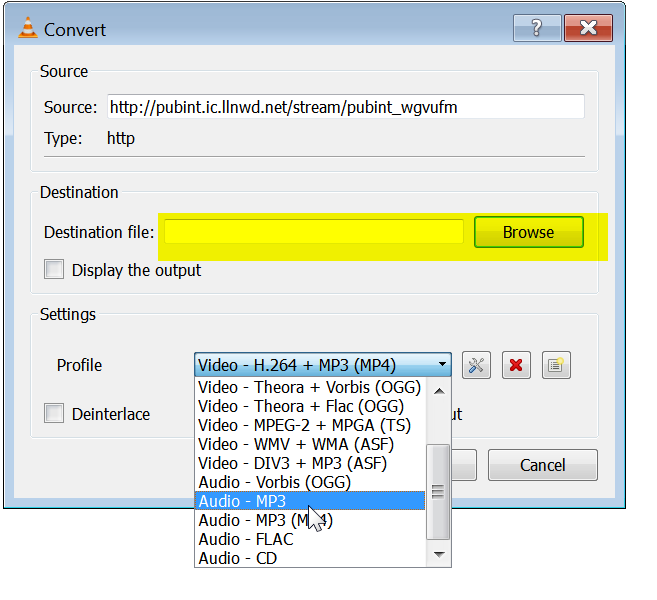
Clicking on “Convert/Save” will bring up the “Convert” dialog box. The URL you entered in the previous step is now in the “Source” field and VLC needs a bit more information before proceeding.
First, you need to tell it where to save the file. Click on the “Browse” button next to the “Destination file” field and then find the directory where you want the file and enter the filename you want to use. Then click on the “Profile” dropdown menu near the bottom of the screen and select the format you want to save the stream in. Since this was an audio-only field, I selected the “Audio – MP3” field.
When everything’s set, click on the “Start” button (it’s the obscured button to the left of the “Cancel” button in the lower right hand part of the dialog box below.
That’s it. VLC will start writing the stream to the file format of your choice.
There is one major potential problem to be aware of–if you stop the recording and then restart it, VLC will write over your initial recording. You’ll lose everything saved before restarting the recording. As far as I could tell, there was no way to force VLC to append new data to the original file or force it to create a new file.